Creating your first MIDlet in NetBeans
After setting
up the development environment and configuring NetBeans, you can start creating the HelloWorld MIDlet. The MIDlet consists
of two classes: HelloWorldMIDlet, which is the main
class and defines the basic functionality of the MIDlet, and HelloScreen, which defines the HelloScreen object used by the main class to display the text "Hello, world!"
on the device screen. In the Series 40 full touch version of the MIDlet,
the HelloScreen class is also used to detect display
orientation changes and adjust the MIDlet UI accordingly.
To create the HelloWorld MIDlet:
Select File > New Project.
Select Java ME > Mobile Application and click Next.
In the Project Name field, enter "HelloWorld".
Uncheck Create Hello MIDlet.
Click Next. The MIDlet setup continues with device platform selection.

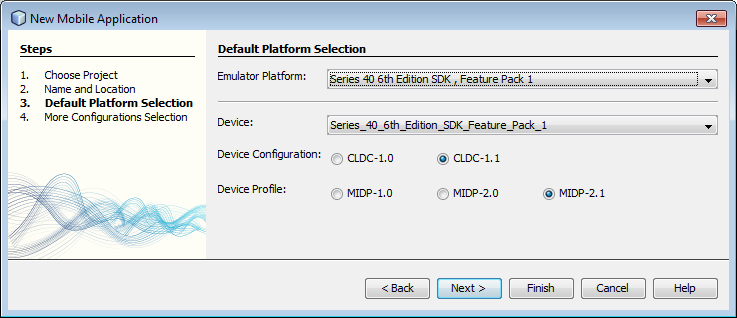
Figure: Creating a new MIDlet project
In the Emulator Platform drop-down menu, select the device platform for which you want to create the MIDlet:
For Series 40 devices, select a Nokia SDK for Java.
For Symbian devices, select a Symbian SDK for Nokia devices.
If you selected a Symbian SDK, in the Device drop-down menu, select SymbianEmulator.
Select CLDC-1.1 and MIDP-2.1.
Click Finish. NetBeans sets up the MIDlet project.

Figure: Choosing the device platform for the MIDlet
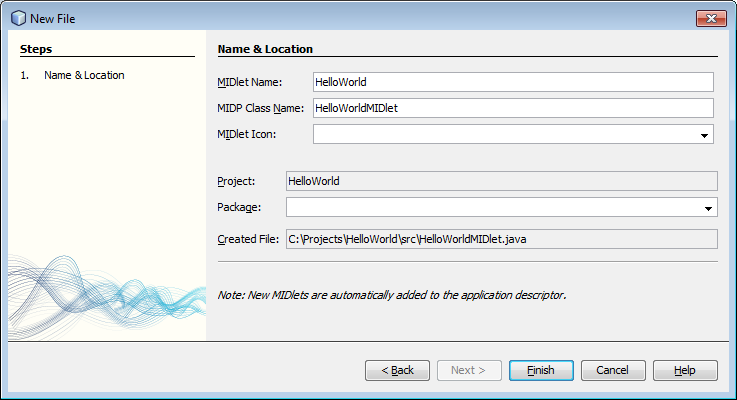
To create the main class for the MIDlet, select File > New File.
Select MIDP > MIDlet and click Next.
In the MIDlet Name field, enter "HelloWorld".
In the MIDP Class Name field, enter "HelloWorldMIDlet".
Click Finish. The
HelloWorldMIDletclass is created in the default package.
Figure: Creating the MIDlet main class
Delete the contents of the
HelloWorldMIDletclass and paste in the following source code:import javax.microedition.lcdui.Display; import javax.microedition.lcdui.Displayable; import javax.microedition.midlet.MIDlet; public class HelloWorldMIDlet extends MIDlet { public HelloWorldMIDlet() { } // Sets the MIDlet's current Display to a HelloScreen object. public void startApp() { Displayable current = Display.getDisplay(this).getCurrent(); if (current == null) { HelloScreen helloScreen = new HelloScreen(this, "Hello, world!"); Display.getDisplay(this).setCurrent(helloScreen); } } public void pauseApp() { } public void destroyApp(boolean unconditional) { } }To create the
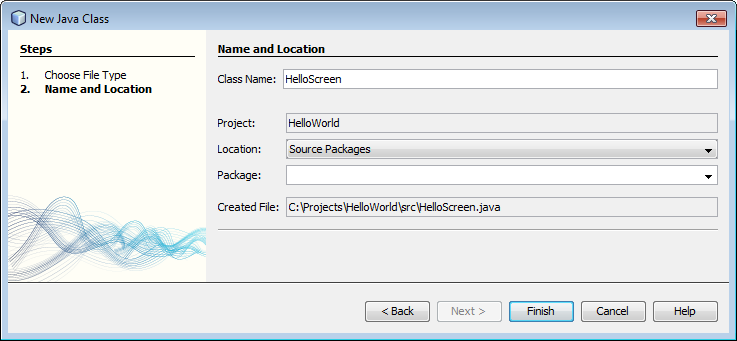
HelloScreenclass, select File > New File.Select Java > Java Class and click Next.
In the Class Name field, enter "HelloScreen".
Click Finish. The
HelloScreenclass is created in the default package.
Figure: Creating the HelloScreen class
Delete the contents of the
HelloScreenclass and paste in the following source code:import javax.microedition.lcdui.*; class HelloScreen extends Form implements CommandListener { private final HelloWorldMIDlet midlet; private final Command exitCommand; // Exit command for closing the MIDlet in the device UI. public HelloScreen(HelloWorldMIDlet midlet, String string) { super(""); StringItem helloText = new StringItem("", string); super.append(helloText); this.midlet = midlet; exitCommand = new Command("Exit", Command.EXIT, 1); addCommand(exitCommand); setCommandListener(this); } public void commandAction(Command command, Displayable displayable) { if (command == exitCommand) { midlet.notifyDestroyed(); } } }Tip: To use the Series 40 full touch version of the
HelloScreenclass, see the source code.Save the project by selecting File > Save All.
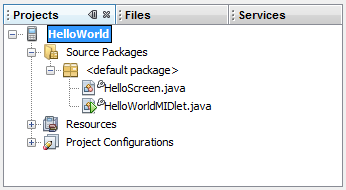
In the Projects pane, right-click HelloWorld and select Deploy.
NetBeans builds the MIDlet and creates the JAR and JAD files used for deploying the MIDlet to a device. You can find the files in the Files pane under the dist folder.

Figure: HelloWorld project viewed in the Projects pane
The MIDlet has been created. You can now deploy it to a device.