Example: Setting softkey label location
The following example shows you how to correctly use the softkey label system properties supported from S60 5th Edition onwards. In this example, the position and color of the softkey backgrounds are changed.
The example code creates a custom Rect class,
which is then used to represent a softkey area. The class defines
the following attributes:
Position (
x,y)Width (
w)Height (
h)
Rect class
class Rect {
  public int x = -1;
  public int y = -1;
  public int w = -1;
  public int h = -1;
}
Parsing properties
You must first retrieve and parse the position
and anchor attributes of the softkey. The following code creates a Rect instance called sk1, which is
set to receive the position, size, and anchor point of the left softkey (softkey1):
String property = System.getProperty("com.nokia.softkey1.label.location");

Rect sk1 = new Rect();

if (property != null) {
    int commaPos = property.indexOf(',');
    String value = property.substring(0, commaPos);
    sk1.x = Integer.parseInt(value);
    String tail = property.substring(commaPos + 1);
    commaPos = tail.indexOf(',');
    value = tail.substring(0, commaPos);
    sk1.y = Integer.parseInt(value);
    tail = tail.substring(commaPos + 1);
    commaPos = tail.indexOf(',');
    value = tail.substring(0, commaPos);
    sk1.w = Integer.parseInt(value);
    tail = tail.substring(commaPos + 1);
    sk1.h = Integer.parseInt(tail);
}

String propAnchor = System.getProperty("com.nokia.softkey1.label.anchor");

int anchor = 0;

if (propAnchor != null) {
    anchor = Integer.parseInt(property);
}
Use the above code as a reference when creating comparable functions for the other softkeys.
Button area and remaining canvas area
After you have retrieved all the required properties, calculate the area occupied by buttons and the area that remains for drawing.
Create new methods for retrieving the points farthest to the left and to the top of all the buttons, and place the buttons accordingly:
If the leftmost point is closer to the left side of the screen than the top point is to the top of the screen, the buttons are placed on the bottom of screen.
If the top point is closer to the top of screen then the left point to is to the left side of the screen, the buttons are placed on the right side of the screen.
Note: Since the buttons do not need to have the same size in this example, it is also necessary to retrieve the extreme values.
// Gets a minimum x value of rectangle
// If the value is below zero (undefined rectangle), the rectangle is ignored
// If there are no soft key buttons, -1 is returned
public int getminX( Rect sk1, Rect sk2, Rect sk3 ) {
   // Initialize minimum with maximum int value
   int minX = Integer.MAX_VALUE;
   if ( sk1.x >= 0 ) minX = sk1.x;
   if ( sk2.x >= 0 && sk2.x < minX ) minX = sk2.x;
   if ( sk3.x >= 0 && sk3.x < minX ) minX = sk3.x;

   if ( minX == Integer.MAX_VALUE )
       minX = -1;

   return minX;
}

// Gets a minimum y value of rectangle
// If the value is below zero (undefined rectangle), the rectangle is ignored
// If there are no soft key buttons, -1 is returned
public int getminY( Rect sk1, Rect sk2, Rect sk3 ) {
   // Initialize minimum with maximum int value
   int minY = Integer.MAX_VALUE;
   if( sk1.y >= 0 ) minX = sk1.y;
   if( sk2.y >= 0 && sk2.y < minX ) minX = sk2.y;
   if( sk3.y >= 0 && sk3.y < minX ) minX = sk3.y;

   if ( minY == Integer.MAX_VALUE )
       minY = -1;

   return minY;
}

// Get the wanted rectangles coordinates:

minX = getminX( sk1.x, sk2.x, sk3.x );
minY = getminY( sk1.y, sk2.y, sk3.y );

Rect drawArea = new Rect();
Rect buttonArea = new Rect();

// Check that at least one soft key button exists
if ( minX > 0 && minY > 0) {
    if ( minX < minY ) {
        // Buttons ale placed on bottom side of screen
        drawArea.x = 0;
        drawArea.y = 0;
        drawArea.w = canvas.getWidth();
        drawArea.h = minY - BUTTON_AREA_MARGIN - 1;

        buttonArea.x = 0;
        buttonArea.y = drawArea.h + 1;
        buttonArea.w = drawArea.w;
        buttonArea.h = canvas.getHeight() - drawArea.h;
    }
    else {
        // Buttons are placed at right side of screen
        drawArea.x = 0;
        drawArea.y = 0;
        drawArea.w = minX - BUTTON_AREA_MARGIN - 1;
        drawArea.h = canvas.getHeight();

        buttonArea.x = drawArea.w + 1;
        buttonArea.y = 0;
        buttonArea.w = canvas.getWidth() - drawArea.w;
        buttonArea.h = drawArea.h;
    }
}
else {
    drawArea.x = 0;
    drawArea.y = 0;
    drawArea.w = canvas.getWidth();
    drawArea.h = canvas.getHeight();
}
Rendering
For the softkey labels, you need to prepare font instances. In
this example, there is a separate font instance for every softkey
button. The most usable font for fitting accurately inside the button
rectangle can be created with the DirectUtils.getFont method supported since Nokia UI API 1.2. Even though all S60 5th Edition and newer Symbian devices support
at least Nokia UI API 1.2, the supported version is still verified
in this example for good practice. If the Nokia UI API version is
not 1.2 or newer, standard fonts are used.
boolean useFreeResizFonts = false;
// Check the free size fonts extension
String prop = System.getProperty("com.nokia.mid.ui.version");
if (prop != null) {
    float version = Float.parseFloat(prop);
    if (version >= 1.2)
        useFreeResizFonts = true;
}

if (useFreeResizFonts) {
    // Free size fonts extension
    // since S60 5.0
    font = DirectUtils.getFont(0, 0, h);
}
else {
    // Standard font
    font = Font.getFont(Font.FACE_PROPORTIONAL, Font.STYLE_PLAIN, Font.SIZE_LARGE);
    if (font.getHeight() > h) {
        font = Font.getFont(Font.FACE_PROPORTIONAL, Font.STYLE_PLAIN, Font.SIZE_MEDIUM);
        if (font.getHeight() > h) {
            font = Font.getFont(Font.FACE_PROPORTIONAL, Font.STYLE_PLAIN, Font.SIZE_SMALL);
        }
    }
}
First, use the paint(Graphics g) method to fill the
background rectangle for every softkey button. The following code
fills the background rectangle for sk1:
g.setColor(sk1Color);
g.fillRect(sk1.x, sk1.y, sk1.w, sk1.h);
Next, determine the proper position for the button label:
// The label has black text
g.setColor(0);

// Label coordinates
int text_x = sk1.x;
int text_y = sk1.y;

// Find a proper label position
if (anchor != 0) {
    // Horizontal position
    if ((anchor & Graphics.HCENTER) != 0)
        text_x += sk1.w/2;
    if ((anchor & Graphics.RIGHT) != 0)
        text_x += sk1.w;

    //Vertical position
    if ((anchor & Graphics.VCENTER) != 0) {
        // This anchor is disallowed for drawString,
        // we must use a little trick
        text_y += (sk1.h – font.getHeight()) / 2;
        anchor = anchor & ~Graphics.VCENTER & Graphics.TOP;

    }
    if ((anchor & Graphics.BOTTOM) != 0)
        text_x += sk1.h;
}

g.setFont(font);
g.drawString(text, text_x, text_y, anchor);
Final view
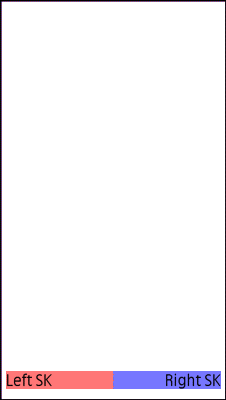
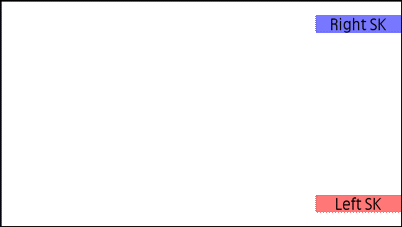
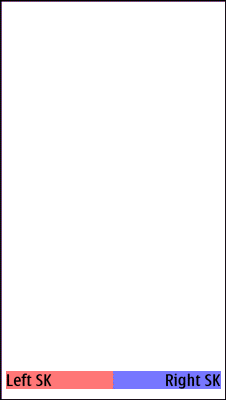
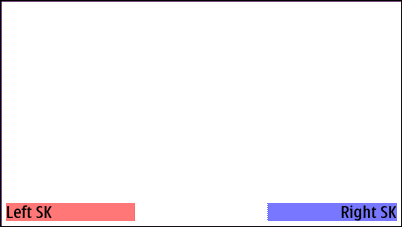
When the softkey label rectangles are filled with light
red (0xff7777) and blue (0x7777ff), and drawArea with white (ffffff), the following images are created:


Figure: Softkey label locations in S60 5th Edition


Figure: Softkey label locations in Symbian^3