Connecting a smart card reader
The SDK supports a smart card reader connection (JSR 177).
To connect a smart card reader to the SDK:
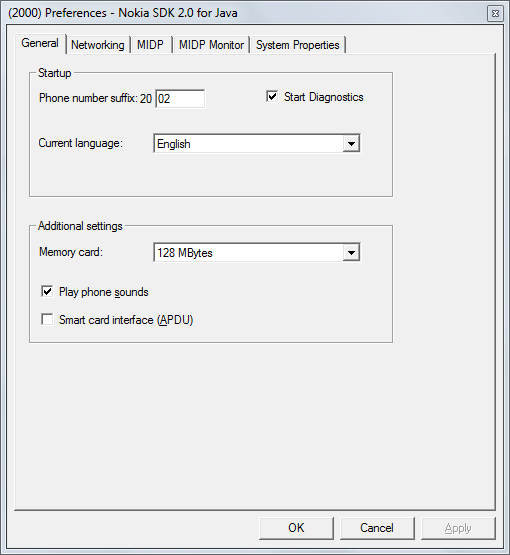
From the Emulator menu bar, navigate to Tools > Preferences. The General tab will be selected by default.

In the Additional settings section, check Smart card interface (APDU) and connect the smart card reader to your PC.
Note: If you do not check the Smart Card interface (APDU) option, the SDK does not recognize any smart card readers that you have connected to your PC.
Select OK.
A confirmation window appears.
Select OK.
- Restart the SDK.
Note: Insert the smart card into the reader before SDK start-up. The smart card interface is cold swappable
On start-up, a pop-up window appears with the following information:
If there is only one smart card reader connected to your PC, the options are either No reader attached or the name of the reader you have attached.
If there are more than one smart card readers connected to your PC, all the readers are listed. You can select only one reader at a time from the list. After selecting the reader, the options are either No reader attached or the name of the reader you chose from the list.
If you experience problems with the smart card reader connectivity, you can redirect the possible errors to a chosen log file of the SDK. This log file is not automatically generated.
Logging smart card reader information
To capture the smart card reader information in a log file:
Open the command prompt and navigate to the directory containing
emulator.exe..Run the following command to log smart card reader information to a file:
emulator > <name_of_the_log_file>For example:
emulator > log.061208.
Note: You can use this log file for MIDP tracing.