On-device MIDlet debugging over WLAN using Eclipse
Install EcmtAgent.sis on to the device.
You can find the sis in the following folder:
\\SDK Instatlation Directory\S60tools\Ecmt\
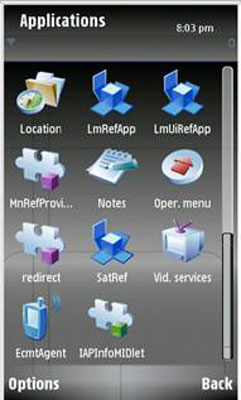
The installed EcmtAgent application can be found under Main Menu >> Application >> EcmtAgent.
Note: Before launching the EcmtAgent, connect the device to any available WLAN from Main Menu >> Settings >> Connectivity >> WLAN
Launch EcmtAgent application on the device after connecting the device to any available WLAN.
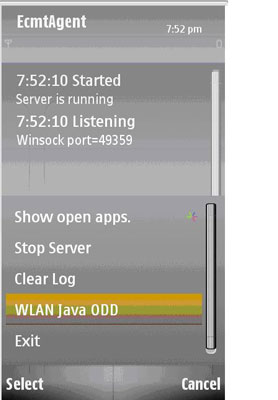
Once the application s launched, select WLAN Java ODD from the options as shown:
The application switches to a new view where the user can enter the address and port number of the system in which the IDE is running.
Connect the PC to the same WLAN where the device is accessable.
Edit the system IP address setting box and enter the PC IP address where IDE is running
Edit the port setting box and enter any free port available on the PC.
To find any free port on the PC, run the command “netstat -a”
This will list all used ports on the PC
Enter any port which is not present in that list
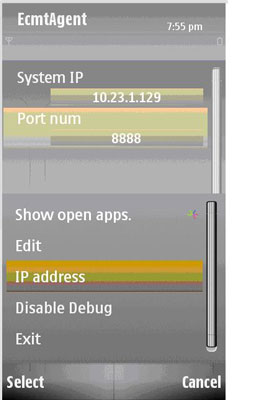
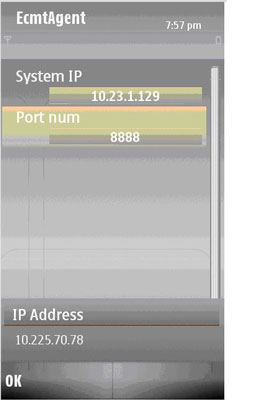
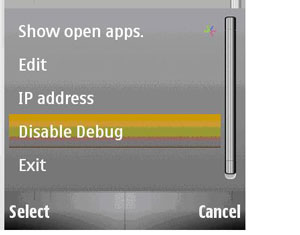
To get the IP address of the device select options>>IP address as shown in the figure. This will give you the IP address of the device.
Note: The device should be connected to the WLAN before step 5 is executed
To confirm the connectivity between the PC and the Device, from command prompt of the PC enter the following command:
Ping<IP Address of the device>
Exit the application
Open Eclipse IDE on the PC.
Open the Project which has to be debugged on the target device.
Install the fresh JAD and JAR of the project on to the device.
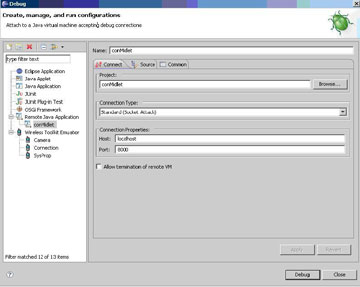
Open the Debug dialogue box of the project. From that dialogue box create a new instance of" Remort java application" as shown.
Once a new instance is created, in the connection properties >>Host Provide the IP address of the target device.
Note: To get the IPaddress of the device follow Step5.
Also provide the port number. This port number should be same as what was given in Step 4.
Run the MIDlet on the device First. It prompts a dialogue box saying that it is using modified VM aguments.Then it checks the WLAN connection on the device. Select the connection where in PC is accessible.
Note: It may take some time to listen the PC
Once the connection is successful, click the" Debug "button on the IDE debug dialogue box. Once the PC sets up connection on the WLAN, it changes its view to debug mode. Now, the user will be able to debug the application on the IDE.
To avoid the change argument message on the launch of the MIDlet and To disable debugging feature, select "Disable Debug" option as shown bellow
