STEW: adding JavaScript to drive the widget logic
In the STEW example, JavaScript files are used to implement widget functionality.
Implementing the button menu

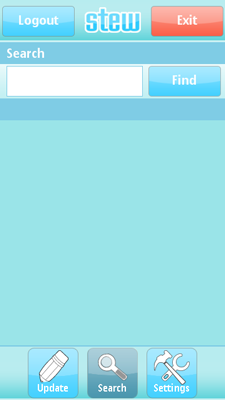
Figure: STEW button menu
The logic for the button menu is implemented in the Menu.js file. A click event handler is assigned to each button by calling the document.getElementById function to retrieve the DOM element of each button. An activate function is assigned to the onclick event handler and executed when the handler is triggered. The function takes the ID of the button as a parameter. It is important to call the function in the correct context.
function Menu() {
	var self = this;

	// Handle clicks from menu buttons to activate the relevant views.
	var updateButton = document.getElementById( "button_update" );
	updateButton.onclick = function() {
		 self.activate( Menu.UPDATE_STATUS_SCREEN );
	};
	var searchButton = document.getElementById( "button_search" );
	searchButton.onclick = function() {
		 self.activate( Menu.SEARCH_SCREEN );
	};
	var settingsButton = document.getElementById( "button_settings" );
	settingsButton.onclick = function() {
		 self.activate( Menu.SETTINGS_SCREEN );
	};
}
Implementing title bar buttons
The STEW title bar displays the widget title as well as Logout and Exit buttons.

Figure: STEW title bar
The logic for the title bar buttons is also implemented in the Menu() function:
var logoutButton = document.getElementById( "button_logout" );
logoutButton.onclick = function() { widgetMenu.activate( Menu.LOGIN_SCREEN ); };
var exitButton = document.getElementById( "button_exit" );
exitButton.onclick = function() { window.close(); };
Changing views
The activate function shows and hides views according to the view ID that it receives as a parameter. Switching from one view to another requires a major screen update, and therefore the WRT widget.prepareForTransition and widget.performTransition methods are used. This prevents screen flicker and adds a fade effect when the views change.
Menu.prototype.activate = function( screenId ) {
	widget.prepareForTransition( "fade" );

	Helper.show( "menu_strip", screenId != Menu.LOGIN_SCREEN );

	// Show the desired screen.
	Helper.show( Menu.LOGIN_SCREEN, screenId == Menu.LOGIN_SCREEN );
	Helper.show( Menu.UPDATE_STATUS_SCREEN, screenId == Menu.UPDATE_STATUS_SCREEN );
	Helper.show( Menu.SEARCH_SCREEN, screenId == Menu.SEARCH_SCREEN );
	Helper.show( Menu.SETTINGS_SCREEN, screenId == Menu.SETTINGS_SCREEN );

	// Update the menu strip manually.
	// Activate the selected button.
	this._activateButton( screenId );
	}

	// Known issue: Below line doesn't work if the activation comes from widget's submenu.
	//widget.performTransition();
	setTimeout ( "widget.performTransition();", 0 );
}
The code above uses a helper function called show to show and hide views. The function is located in the Helper.js file. The function retrieves the DOM element of the ID it accepts as a parameter and assigns or deletes a hidden style to or from it by using the className property.
Activating views
The logic behind each view needs to be informed that the view is being activated, so that the functions assigned to views can be performed when the view is shown. For example, reload data from the storage in the Settings view, refresh data in the Update Status view, and so on. Each view implements an onActivated function to receive notification when it is activated.
if ( screenId == Menu.LOGIN_SCREEN ) {
	loginScreen.onActivated();
} else if ( screenId == Menu.UPDATE_STATUS_SCREEN ) {
	updateScreen.onActivated();
} else if ( screenId == Menu.SEARCH_SCREEN ) {
	searchScreen.onActivated();
} else if ( screenId == Menu.SETTINGS_SCREEN ) {
	settingsScreen.onActivated();
}